
chi4good

CHI4Good is an opportunity & an obligation for me to leverage my skills & time to make a positive impact on my community & the world.
Kathy Baxter Salesforce
Deadlines
Marking Table Headers
All header rows of tables should be marked, so that the relationships are preserved when the presentation format is changed.
Word
These instructions were created using Word 2007. The instructions are very similar for other versions of Word.
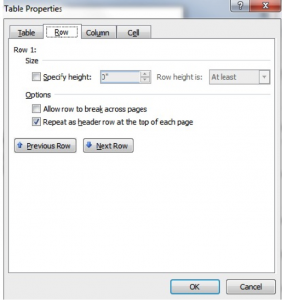
- Access the table header row’s context menu and select Table Properties…
- Select the Row tab.
- Check “Repeat as header at the top of each page” as shown in the following image.
Word for Mac
Although table headers can be added in some versions of Word for Mac, there is no way to generate a tagged PDF using Word for Mac. So the information will be lost.
The best choice is for authors to open their completed Word file on a Windows machine. Authors can then mark table headers as per the instructions above, and generate a tagged PDF, using the Windows version of Word.
LaTeX
Unfortunately tools do not yet exist to create a tagged PDF. Authors using LaTeX will need to first create an untagged PDF. Then, within Acrobat, authors can add tags to the PDF. Finally, within Acrobat, authors can mark table headers, using the instructions below.
Acrobat
If you cannot mark the table headers before creating the PDF, then they can be marked using Acrobat, after the PDF has been created, and tags have been manually added to the PDF using Acrobat.
- In the View menu, select Navigation Panel, then select Tags.
 Note that in this case, the table headers were not formatted as illustrated in Examples 1 and 2, and are marked as data cells (TD). To change these to TH tags:
 - On the Tags tab, open the table row that contains the header cells, as shown on the image above.
- Select on the first data cell and select Properties…
- On the Tags tab in the Properties dialog, use the Type dropdown to change Table Data Cell to Table Header Cell.
- Repeat for all the table header cells in the first table row.
Quick Links
Sponsors
Hero Sponsors

Champion Sponsors


![]()


![]()
![]()